Understanding the Importance of Depth in Drawing
Depth in drawing transforms a simple sketch into a lifelike piece of art. It creates an illusion of three dimensions on a two-dimensional surface, making artwork more engaging. Mastering depth enhances realism and adds complexity to drawings.
Depth provides context and space in art. It allows viewers to perceive distances and relationships between objects, making compositions more visually appealing. Without depth, drawings can appear flat, lacking vitality and interest.
Artists use depth to guide viewers’ attention. By varying distance and size of elements, they develop focal points and create narratives within the artwork. This technique not only makes the piece more engaging but also helps convey the intended message effectively.
Depth improves overall artistic skill. Understanding and utilizing depth refines an artist’s perception and technique, leading to better execution in future works. It’s an essential skill for anyone serious about drawing, from the beginner to the professional.
Various methods depict depth, each contributing to a richer, more immersive experience. Techniques like:
- perspective
- shading
- overlaps
are crucial in drawing. Employing these effectively can significantly enhance the quality and impact of artwork.
Technique 1: Linear Perspective
Developing a strong sense of linear perspective allows artists to create realistic and engaging drawings. Linear perspective involves representing three-dimensional objects on a two-dimensional surface using converging lines.
One-Point Perspective
One-point perspective uses a single vanishing point on the horizon. All lines converge toward this point. It’s often used for compositions with a straight-on view, such as a road receding into the distance. To construct it, draw a horizon line then establish a vanishing point. Next, draw lines from this point to the edges of your objects. Vertical and horizontal lines stay parallel, maintaining the structure.
Two-Point Perspective
Two-point perspective employs two vanishing points on the horizon. This technique is useful when depicting objects at an angle. Draw a horizon line and place two vanishing points. Lines parallel to the sides of objects converge toward the two points. This method captures angles more naturally. For instance, use two-point perspective to draw a building’s corner, giving a realistic sense of depth.
Three-Point Perspective
Three-point perspective adds a third vanishing point, usually above or below the horizon line. This technique is ideal for views from an extreme angle, like looking up at a tall building. Draw the horizon line, set two vanishing points on it, and establish a third point above or below. Lines converge toward all three points, creating dramatic depth. Use three-point perspective to enhance dynamic scenes with towering structures or steep views.
Mastering these linear perspective techniques enhances your ability to create depth, contributing to more realistic and visually appealing drawings.
Technique 2: Overlapping Elements

Overlapping elements add depth by positioning objects partially in front of others. This simple method helps indicate which objects are closer or farther away.
Creating Foreground, Middleground, and Background
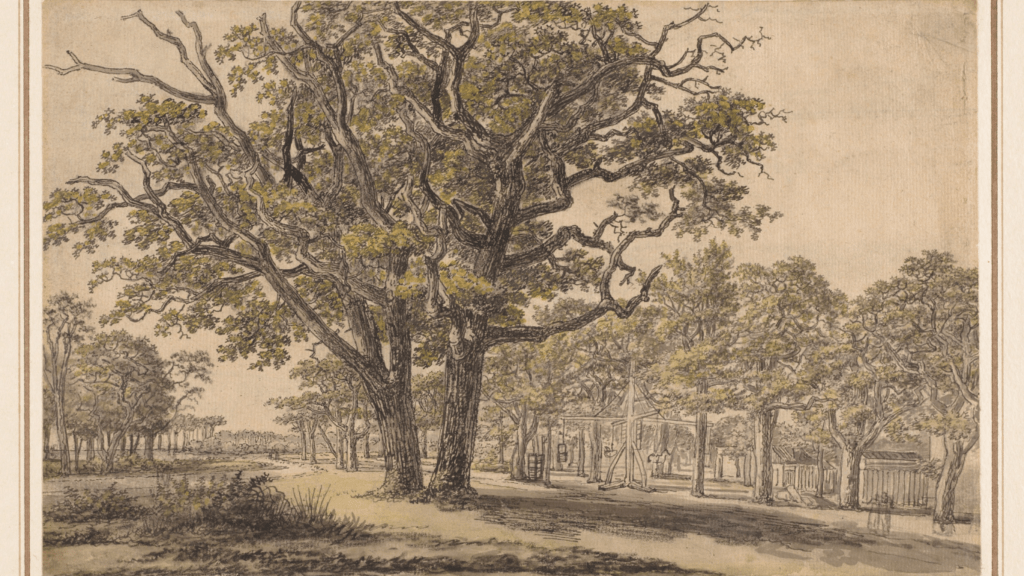
Setting up a drawing with distinct foreground, middleground, and background layers enhances depth. The foreground, closest to the viewer, includes more detailed objects. For instance, in a landscape drawing, detailed grass and rocks populate the foreground. The middleground contains elements like trees or buildings, with moderate detail. The background shows distant elements like mountains or the horizon line, typically with less definition.
Using Overlapping to Define Space
Overlapping elements create a hierarchy of space within the drawing. When I draw, I place objects partially in front of others to show which are closer. In a crowded market scene, for instance, overlapping figures of people or stalls illustrate depth effectively. This technique also helps manage the spatial relationships between objects, improving overall composition and visual flow.
Technique 3: Varying Line Weight
Using different line weights can significantly enhance depth in drawings. By incorporating both thin and thick lines, artists can create a dynamic range of visual elements.
Thin vs. Thick Lines
Thin lines are ideal for conveying delicate details. Using these lines for background elements can push them farther away in the viewer’s perception. In contrast, thick lines draw attention and bring objects forward. This variation can create a sense of spatial hierarchy, where thicker lines make parts of the drawing appear closer.
Enhancing Depth with Line Variation
Varying line weight can dramatically enhance the depth of a drawing. Shifting from thin to thick lines, or vice versa, along the contour of a single object can make the object appear more three-dimensional. For example, applying thicker lines to the side of an object that’s closer to the light source and thinner lines to the shadowed side can create a sense of volume. Combining these strategies leads to more captivating and realistic drawings.
Technique 4: Shading and Gradation
Shading and gradation are fundamental for creating depth in drawings. They add realism by mimicking how light interacts with objects.
Light Source and Shadows
Identifying the light source is crucial in shading. It defines where shadows fall and highlights appear. For example, if the light comes from the left, shadows form on the right side of objects. Shadows help ground objects, making them look more tangible. For accurate shadows, observe real-life lighting or use references. Consistency in shadow direction and intensity ensures a cohesive look.
Techniques for Smooth Shading
- To achieve smooth shading, use various techniques.
- One popular method is the gradient technique, involving gradual transitions from light to dark tones. This helps in depicting curved surfaces.
- Another technique is hatching, where parallel lines build up tone. Cross-hatching uses intersecting lines to create depth. Blending is also effective, using tools like blending stumps or tissue paper to smooth pencil strokes.
- For digital drawings, opt for gradient tools and soft brushes to achieve similar effects.
- Practice these techniques to enhance your ability to create realistic and engaging drawings.
Technique 5: Atmospheric Perspective
Atmospheric perspective involves using color, clarity, and detail to create depth in your drawings. Artists can make distant objects appear hazy, lighter, or cooler to mimic the effect of the atmosphere.
Color Grading for Depth
Color grading helps depict distance by altering hues and saturation levels. Objects in the distance typically appear lighter and less saturated. For example, mountains far away might have a blue or gray tint. Adjusting the color value can enhance the illusion of depth in your artwork.
Reducing Detail for Distance
Reducing detail as objects recede into the background reinforces the sense of depth. Distant objects should have fewer textures and less defined edges. For instance, leave out intricate patterns on faraway trees and buildings. This technique contrasts with the well-defined details in the foreground, strengthening the perception of space.


