Understanding Cross-Hatching
Cross-hatching involves drawing intersecting lines to build texture and shadow in artwork. Starting with parallel lines, artists can create a base layer, ensuring equal spacing for uniformity. Subsequent layers add depth, often laid at different angles to the base layer.
- Adjusting Line Density
Densely packed lines increase darkness, while sparse lines produce lighter tones. For instance, shading a sphere may begin with widely spaced lines at the highlight, gradually adding more until reaching the shadow.
- Manipulating Line Direction
Changing line direction creates various textures. Curved cross-hatching can depict rounded forms like faces, while straight lines suit harsher surfaces such as rocks or metal. Mastering direction ensures accurate representation of different materials. - Layering Techniques
Layering provides nuanced shading and textured gradients. First, lay down a light base layer. Add another at a different angle for intermediate shading, and a third for the darkest areas, achieving a complex rendering.
- Using Various Tools
Although pens are common, other tools such as pencils or markers offer different line qualities. Pen lines are crisp and permanent; pencils provide softer, adjustable lines. Experimenting helps find the right tool for desired effects.
Types of Hatching Patterns
There are multiple hatching patterns, each serving different artistic purposes. Classic examples include parallel hatching, cross-hatching, and contour hatching.
- Parallel Hatching
Parallel hatching involves drawing linear strokes in one direction. This technique is effective for subtle gradient transitions.
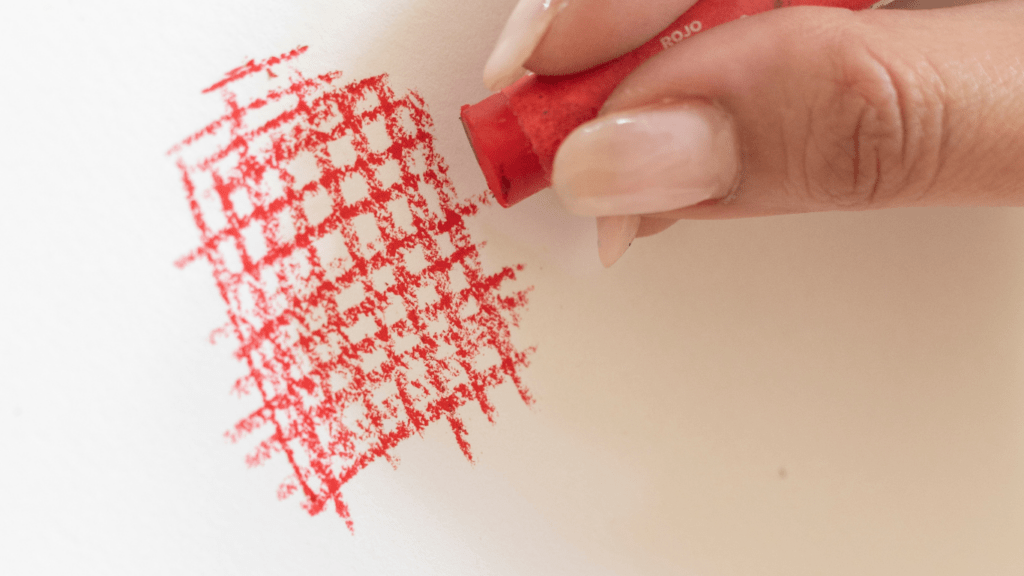
- Cross-Hatching
Cross-hatching builds on parallel hatching, adding intersecting lines for more intense shading. Altering angles creates dynamic textures.
- Contour Hatching
Contour hatching follows the form of the subject. For example, drawing lines along the curves of an arm can suggest its curvature and volume.
The Role of Practice
Consistent practice is essential for mastering cross-hatching. Begin with simple shapes like spheres or cubes, focusing on light sources and shadows. Progress to more complex subjects as skills improve.
Learning from Masters
Many famous artists have utilized cross-hatching in their works. Studying pieces by Leonardo da Vinci or Albrecht Dürer reveals skilled use of this technique. Analysis of these works offers valuable insights on application and innovation.
Progressive practice, attention to detail, and studying artworks from the masters provide a well-rounded approach to mastering cross-hatching.
Historical Context of Cross-Hatching
Cross-hatching has a rich history in the world of art. Originating in the Renaissance period, it became a favored technique among artists for adding depth and dimension to their work. Leonardo da Vinci and Albrecht Dürer, two renowned Old Masters, frequently used cross-hatching in their sketches and engravings to achieve realistic shading.
In the Renaissance, artists sought to bring a lifelike quality to their drawings. They needed techniques that could convey three-dimensional forms on two-dimensional surfaces. Cross-hatching, with its intersecting lines, offered a solution. Da Vinci’s anatomical studies and Dürer’s detailed engravings used intricate cross-hatching patterns to illustrate musculature and texture.
During the Baroque period, the technique continued to evolve. Artists like Rembrandt used cross-hatching to create dramatic contrasts between light and shadow. This period emphasized dynamic compositions and emotional intensity, and cross-hatching was essential for achieving these artistic goals.
In the 19th century, cross-hatching saw resurgence with the advent of printmaking methods like etching and lithography. Artists like Gustave Doré utilized it intensively in their illustrations to add intricacy and depth. Cross-hatching became integral to the visual style of many literary and scientific illustrations, bringing narratives and descriptions to life with meticulous details.
In modern times, cross-hatching is prevalent in various art forms, from comic book illustrations to digital art. Contemporary artists continue to explore and expand the possibilities of this classic technique, merging traditional methods with new technology to create innovative visual experiences.
Materials and Tools for Cross-Hatching

Choosing quality materials is vital when engaging in cross-hatching. The right tools considerably impact your drawing’s texture and depth.
Choosing the Right Pen or Pencil
Opting for the appropriate pen or pencil significantly affects the outcome of cross-hatching. Fine-tipped pens, like Micron or Staedtler, offer precision and consistent ink flow, crucial for detailed work. Mechanical pencils enable steady, thin lines and don’t require sharpening. I often alternate between 2B and 4B pencils to adjust the intensity and softness of my lines. Dip pens provide fluidity and variation in line width but require practice to control.
Selecting Paper Types
Paper choice affects the texture and quality of your cross-hatched drawings. Smooth paper, such as bristol board, ensures clear lines without feathering and is ideal for pen work. Textured papers, like cold-press watercolor paper, add an extra dimension to pencil drawings. When I use heavier ink, I prefer thicker paper to avoid bleed-through. Always test your tools on the paper type before committing to a final piece.
Fundamental Techniques of Cross-Hatching
Mastering cross-hatching involves understanding basic patterns, line density, and layering methods. These components are key to enhancing your drawings’ depth and texture.
Basic Patterns
Simple patterns form the foundation of effective cross-hatching. Start with parallel lines, spaced evenly. To introduce depth, intersect these lines at varying angles. Practice creating squares and triangles by altering line intersections. Aim to maintain consistent pressure for uniform lines.
Controlling Line Density
Adjusting line density can enhance shading. Increase shadow intensity by drawing lines closer together. For lighter areas, space lines farther apart. Test various densities on scrap paper to see their effects. Remember, higher line density conveys darker shadows and lower density indicates lighter tones.
Layering Techniques
Layering lines adds complexity to your drawings. Begin with a base layer of parallel lines. Add a second layer at a different angle to build shadow intensity. Continue layering, alternating angles to achieve the desired effect. Use more layers for complex textures, applying light pressure to avoid overpowering the base layers.
Understanding these techniques lets any artist create nuanced, detailed drawings. Practical application and experimentation with each method refine your skills and enhance your artwork.
Advanced Cross-Hatching Techniques
Let’s dive into advanced techniques that can elevate your cross-hatching skills. Mastering these methods allows your drawings to achieve a new level of sophistication.
Creating Textures
Focusing on textures adds realism to your drawings. Varying line weight can create distinct textures. For example, thin, light lines can mimic softer surfaces like fabric, while thicker, darker lines suggest rough textures like stone or wood. Combining short, quick strokes and long, continuous ones can also mimic different materials. Testing different hatching patterns on a sample sketch before applying them to your final piece ensures consistency.
Rendering Light and Shadow
Effective light and shadow create dynamic images. Gradually increasing line density can suggest gradual transitions from light to dark. For instance, start with widely spaced lines in light areas and gradually decrease the spacing as you move into shadowed areas. Cross-hatching with multiple layers in intersecting directions enhances the depth of shadows, making them appear more natural. Observing the light source and how it interacts with objects ensures realistic shading.
Adding Depth and Dimension
Depth and dimension make your drawings pop. Using perspective in your hatching lines can create a 3D effect. Lines that follow the form of the object, curving with its shape, add volume and dimensionality. Alternating the direction and density of lines in different planes and layers reinforces the illusion of space. Blending cross-hatching techniques with single-direction hatching can integrate different depths within the same drawing.
Common Mistakes and How to Avoid Them
Cross-hatching requires practice and precision. Understanding common mistakes ensures you improve technique and achieve better results.
Overlapping Lines
Overlapping lines can create unintended shadows or muddled textures. Avoid this by maintaining consistent line direction and spacing. If shadows need intensifying, add another layer of hatching rather than overlapping existing lines. This approach keeps the drawing clean.
Inconsistent Pressure
Inconsistent pressure on your pencil or pen can produce uneven lines. Maintain a steady hand and use controlled pressure. Practicing with different pressures on scrap paper helps develop a consistent stroke. Adjusting grip and angle also contributes to better pressure control.
Uneven Spacing
Uneven spacing between lines results in irregular shading. Keep spacing uniform by planning and lightly sketching guidelines before finalizing your hatches. Gradually increasing line density in shadow areas, rather than spacing variations, ensures smoother transitions and uniform textures.
Practical Applications of Cross-Hatching
Cross-hatching adds realism to various drawing genres. Mastering this technique enriches artistic expression and enhances visual depth.
Portraits
Cross-hatching brings out facial features with lifelike detail. I focus on varying line density to emphasize shadows and light, creating depth in eyes and cheeks. For hair texture, I use directional lines that follow natural growth patterns, giving a realistic effect. Fine lines for soft contours and thicker lines for deeper shadows ensure an accurate and compelling representation of the subject.
Landscapes
In landscape art, cross-hatching helps illustrate diverse environmental textures. For instance, I apply tight, clustered lines for grassy areas and sweeping, loose hatches for the sky. Adjusting line spacing adds depth to distant hills and trees. Combining techniques, such as shorter strokes for rocky terrains and elongated lines for water reflections, offers a detailed, vivid portrayal of natural settings.
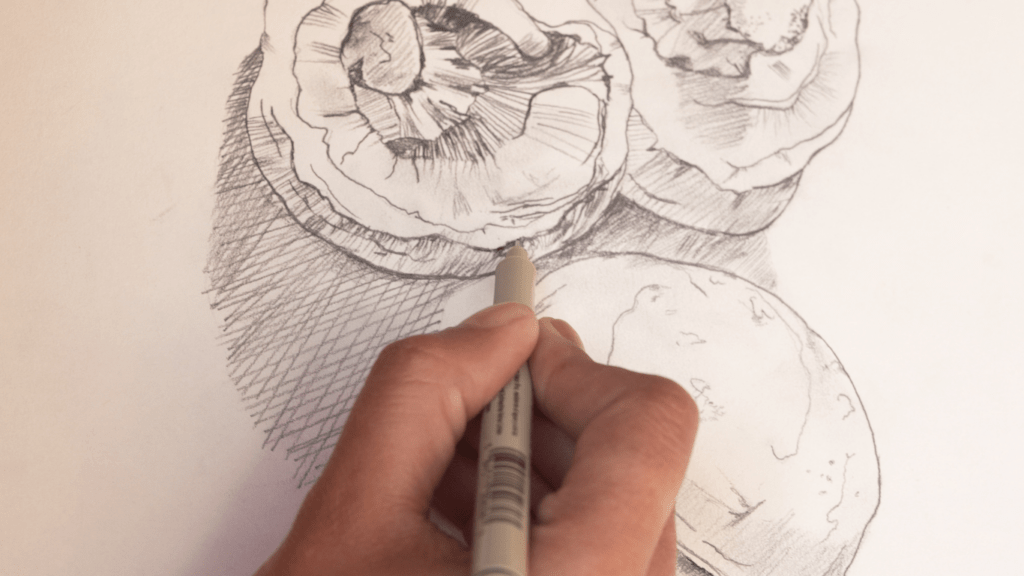
Still Life
Still life drawings benefit from cross-hatching by showcasing the texture of objects. I use intersecting lines to illustrate shadows on fruits, ceramics, or fabrics. Varying pressure and layering achieve a three-dimensional effect, making objects appear tangible. Fine hatching highlights delicate surfaces like glass, while bold strokes underline rough textures like wood or stone.